An RV rubber roof is known to be lightweight and durable. It is also popular for being resistant to harsh elements. However, that does not necessarily mean that it is not prone to any forms of damage. In fact, there is a risk for it to get damaged by certain elements, like strong winds that might cause a branch of a tree to punch through the roof.
Such can result in a serious leak. In addition, there are also mold and mildew that have the tendency of compromising the integrity of your roof. Fortunately, you have the chance of avoiding all the mentioned problems and repair the issues on your roof with a few tips.
[amazon box=”B01N0ECUXX”]
Here are tips for ensuring that you seal your RV rubber roof and repair it the most effective way possible.
Tip #1 – Inspect the surface thoroughly
Prior to starting to repair and seal the leaks in your RV roof, it is important to inspect it thoroughly first so you can gain an accurate idea of the specific spot where the issues are visible. This will also give you a clearer idea of the specific surfaces and areas that you need to seal, patch up, or fix.
When inspecting the roof surface of your RV, make sure that you do it by walking properly. What you have to do to walk properly along the roofline is to lay down a plywood first along the rubber roof’s seams. Walking properly over the plywood can help distribute your weight evenly, making it much easier to do the inspection.
Tip #2 – Target the defect or root cause of the problem

Remember that slapping on some sealant will not successfully solve the leak if you do not fix the root cause of the problem. You have to identify exactly what is causing the issue on your roof. In case the problem is on the seams or corners of the RV, then it would be best to get a pry bar and get rid of the old trim and any existing water damage.
Not fixing the water damage prior to repairing the rubber roof will only cause the whole surface to rot eventually. In fixing this problem, applying a simple liquid compound, which you can buy at the majority of RV and boating stores, can help. Once done, you can put back the trim and prepare so you can start fixing and sealing the rubber roof.
Tip #3 – Learn how to deal with small leaks effectively
In case of a small or minor leak found in your rubber roof, then note that sealing it is possible by applying a rubber roof coating over it. Such leaks only result from minor issues with one of the roof’s seals. Prior to applying the coating, though, you will have to clean the area with the leak thoroughly first.
After that, get a paint brush then use it to apply the coating over the leak. You can actually do that in the same way you paint a room’s wall. Since the leak is only minor, take note that you can solve the issue with just a couple of coats. Ensure, however, that you check it thoroughly so you will really know if the problem is indeed minor.
Tip #4 – Avoid using harsh abrasives
When repairing and sealing your RV rubber roof, one important tip you have to remember is to avoid using harsh abrasives to it. It is because these abrasives have the tendency of causing the roof to lose its ability to resist water and various weather conditions.
The abrasives might also cause the rubber coating to be stripped off from your roof. In this case, you should avoid them, particularly solvents that are based on petroleum as they can trigger plenty of roof problems.
Tip #5 – Do not poke holes
When you are on the stage of fixing the roof and sealing its leaks, you have to ensure that you do not poke holes or cause the problematic spot to become bigger. You may think that the visible bubbling on your RV’s roof means that you also have to relieve pressure from it but that won’t fix the problem.
What you have to do, instead, is to put the coating designed for rubber roofs directly over the bubbling parts. Do not open the holes up even further as such might only trigger an increased number of water leaking issues.
Tip #6 – Make sure to use the right sealing products
When looking for the right product to seal your RV rubber roof, it is important for you to find the right one. Note that you can find products designed for both commercial and residential use, making the act of choosing between them a bit confusing. As a guide, consider looking for a product, which is specifically designed to repair RV roofs.
Find out which of the offered sealants is compatible with your roof. Visit your local store and find out if they are offering Eternabond, too, as it is a great product that you can use to repair your RV roof and seal its seams permanently.
You can also use a rubberized leak stopper to fix your RV roof. It works by seeping into crevices and cracks as a means of bonding with the metal then creating a permanent seal. When using this product, make sure that you are wearing gloves. Use a trowel or an old paint brush to ensure that the roof is coated evenly.
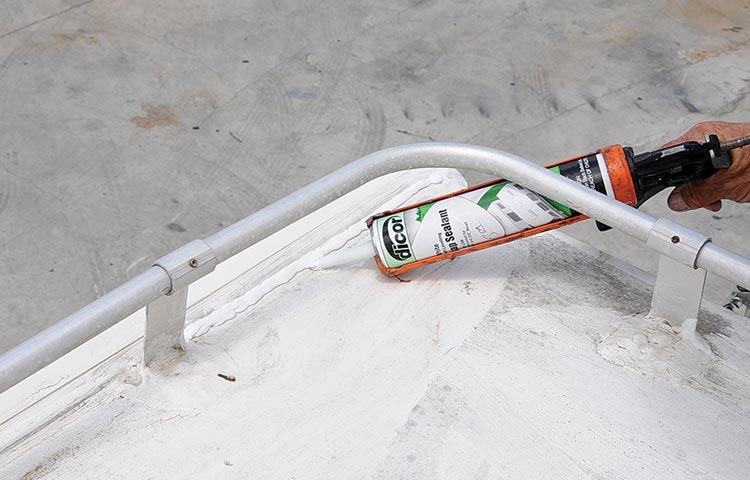
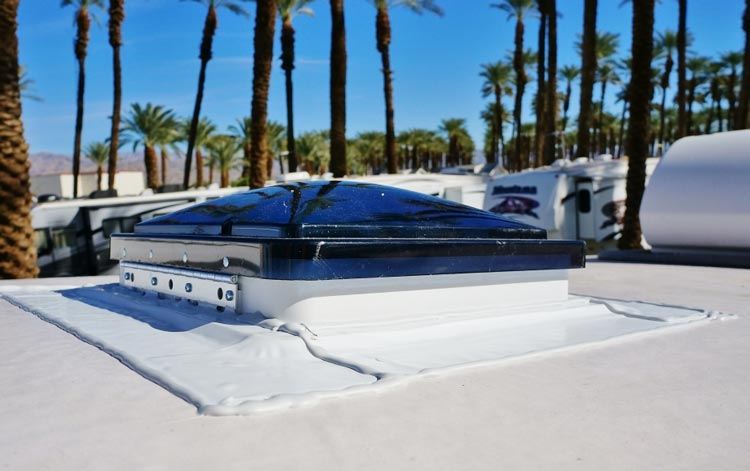
When you are applying your chosen sealer, ensure that you seal everything that sticks through the roof, including vents and antennas. Such parts of the roof might develop small leaks that might lead to damages that will most likely stay hidden for years.
In this case, you have to coat the seams well. All seams should be covered, not just those parts that were damaged. Doing this tip is the key to preventing future leaks in the roof. As for sealing the roof joints, note that you can make use of a self-leveling sealant.
Inspect all seams on an annual basis. Also, do not forget to touch up all cracks with the sealant so you can prevent the risk of dealing with water damage in the future.
Conclusion
RV rubber roof repair and maintenance is crucial to extending its life. It is important for you to do something that will fix the common issues affecting RV roofs, such as leaks as well as other damages triggered by UV rays and oxidation.
As a means of preventing possible damages to your RV rubber roof, it is also advisable to invest in an RV cover. It can offer the protection that your RV roof needs during extreme weather conditions.
Make it a point to check and inspect the roof regularly, too, so you can instantly address any issues, such as leaks, thereby preventing them from getting worse.